This Vue is a Javascript framework for building web apps. As with other frameworks, it allows using reusable components. Check how to use components in Vue
Previously I showed you how to get started with Vue, and I have promised that there will be a second part, and here you go!
Spoiler alert: there will even be a third series, but to the point!
So since we know the basics of Vue, we now have to dig into the Vue platform to create a custom component. We first create a component representing every player in our football (soccer??) team. We learn several basic concepts throughout the process, like calling components within another component, sending the data to the component via props, or using a provide/inject approach.
Components Basics

Components are reusable Vue instances. In the App that I started work on in the last article, there is the main component: App.vue.
Any other components accept the same properties as the root component: data, computed, methods, watch, etc.
Three parts of a component in Vue
Single-file component vue file comprises three pieces: HTML syntax to determine the visual view for the component. JavaScript provides a list of properties for creating the component, using standard JavaScript module syntax exports in JS. Style sheets are used in defining the best user interfaces.
You have to make a new file (typically in the components folder). Let’s name this file: PlayerCard.vue.
First, add a template section with HTML elements:
<template> <h1>This is a new component</h1></template>Export Vue components
To be honest, for a long time, I thought that I needed to add another section beneath the Templates section: and add an export object, like this:
<script>export default {}</script>But it is not necessary. You can have components only with the template section. Anyway, typically, you have more sophisticated components in apps, so it’s good to add an export default object with a name property.
<template> <h1>This is a new component</h1></template><script>export default { name: 'PlayerdCard'}</script>How to import Vue components
Since we have exported components, we can use them in another place. In this case, we are going to import the PlayerdCard Vue component into the App component. To do so, let’s:
Import child components into parent components inside script tags
<script>import PlayerCard from './components/PlayerCard.vue';
export default {  name: 'App',(...)
Register child component in a parent component
We need to let the App component know that it can use the PlayerdCard component. There is a components property that is responsible for registering components:
<script>import PlayerCard from './components/PlayerCard.vue';

export default {  name: 'App',  components: { PlayerCard },(...)
FINALLY. Use child component to render a child component template.
To render the PlayerCard component, you must put a custom element inside the App component template. We imported the component as PlayerCard, so this is the name of the custom element:
<template>  <PlayerCard/></template>
<script>import PlayerCard from './components/PlayerCard.vue';
export default {  name: 'App',  components: { PlayerCard },  // other stuff below  data() {    return {      players: [      ]    }  },  computed: {  },  methods: {  watch: {  }}</script><style></style>
Global and local components
We registered globally our first component in App.vue, a root component. This is a typical approach, but sometimes you have specific components used in a minor part of the App.
Vue allows you to register components in other components. So you can register the component in the PlayerCard component instance, and you can use it and in any children of it then.
It means that the component is registered locally, and it will not be available in parent components - in our case, in the app component object.
Component communication
The PlayerdCard component is working, but it’s not too helpful. Let’s add some content to it:
<template> <div class="player"> <h1>{{ player.name }}</h1> <img :src="player.image" :alt="player.name" /> <p><strong>{{ player.club }}, {{ player.country }}</strong></p> <p>Position: {{ player.position }}</p> <p> Price: {{ player.price }} <strong v-if="player.playerLabel">{{ player.playerLabel }}</strong> </p> <button type="button" @click="toggleForSale()"> <span v-if="player.forSale">Remove from transfer list</span> <span v-if="!player.forSale">Add to transfer list</span> </button> </div></template>A player object is used in many places, but the component object does not include player data. How to pass player data to the component?
Introducing props
To pass data to the components, you can use props. Props are HTML attributes that can be, let’s say, moved to the component scope.
First, we need to define that the PlayerCard component can receive a player prop:
export default { name: "PlayerdCard", props: ["player"],};Then we can pass the player prop to the PlayerCard in App.vue
<template> <PlayerCard :player="players[0]" /></template>A player is an array defined in data of the App component:
export default { name: 'App', components: { PlayerCard }, data() { return { players: [ { id: 1, name: 'Mo Salah', club: 'Liverpool FC', country: 'Egypt', position: 'Striker', price: 2000, image: './avatar.png', forSale: false }, { id: 2, name: 'Robert Lewandowski', club: 'FC Bayern', country: 'Poland', position: 'Striker', price: 3000, image: './avatar.png', forSale: true } ] } }}</script>To make the example more accurate, let’s iterate through the players’ array using v for directive and display all players on the screen:
<template> <PlayerCard v-for="player in players" :key="player.id" :player="player" /></template>Supported props
Above, we passed an object as a prop, but you can also give other types. Take a look at prop types that Vue supports:
-
String
-
Number
-
Boolean
-
Array
-
Object
-
Date
-
Function
-
Symbol
Props validation
When I registered a prop in the PlayerCard component, I just pasted a name into the props array:
props: ["player"];but there is an option to validate props. Take a look:
props: { player: Object;}Now, the component expects that player will be an object, so any other type passed to the component will throw a warning in the console.
Also, you can specify that prop is required:
props: { player: Object, required: true}Default value:
props: { player: Object, default: { name: 'Bot' }}Besides, there are more options. Please follow Vue docs to meet them all. The last thing that I want to do here is repeating Vue docs.
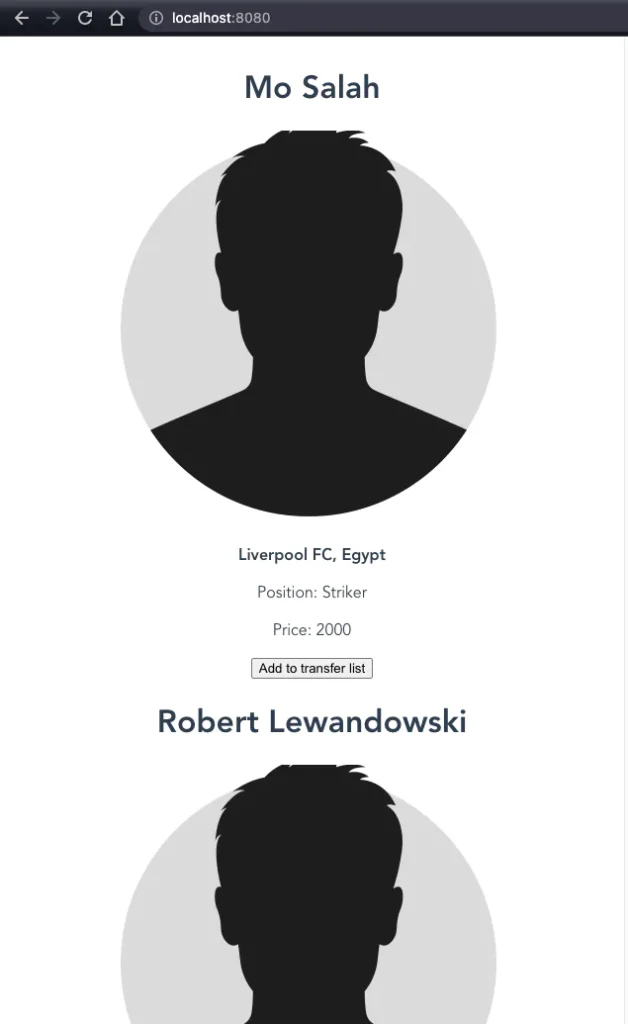
After this step, the App renders two players:

Custom events: child-parent communication
Our very first Vue component works, but there are some bugs. When I click on “add to transfer list,” I see the error in the console:
Uncaught TypeError: _ctx.toggleForSale is not a functionThat happens because, in the PlayerCard, we don’t have the toggleForSale function. That function is in the scope of the App Vue component.:
methods: { toggleForSale() { this.forSale = !this.forSale; }},Anyway, that function is outdated. It worked in the case when we had one player. Now we have an array of players, so we have to update the toggleForSale function to make that possible.
methods: { toggleForSale(playerId) { const player = this.players.find(player => player.id === playerId); player.forSale = !player.forSale; }},Now the function receives the playerId parameter to identify which player should be modified, but still – the toggleForSale function is in the scope of the App component. Is it possible to call this method from other Vue components? Especially from child components?
There is a way to do that: custom events!

Defining custom events
To define an event, you should add it to the emits array like this:
export default { name: "PlayerdCard", props: ["player"], emits: ["toggle-for-sale"],};Technically, it’s not obligatory but is a good practice to define events because then it’s more clear to understand how components work.
The next step is emitting our custom event when the user clicks on the button:
<button type="button" @click="$emit('toggle-for-sale', player.id)"> <span v-if="player.forSale">Remove from transfer list</span> <span v-if="!player.forSale">Add to transfer list</span></button>Lastly, we have to listen to this event in the App component:
1// App.vue<template> <PlayerCard v-for="player in players" :key="player.id" :player="player" @toggle-for-sale="toggleForSale" /></template>For the @toggle-for-sale custom event, I bound toggleForSale function available in App.js, and now the functionality works as expected.
Validating custom events
As props, the custom events can be validated. It’s possible by defining emits not as an array but as objects. Each property of that object is a custom event name, and it’s a validation function:
emits: {    'toggle-for-sale': (playerId) => {        if (!playerId) {            console.warn('Player ID is missing')
            return false;        }
        return true    }}
Prop drilling problem
If you came here from React, you are probably familiar with a common problem called: props drilling. If not, let me explain quickly by example.
We are going to add two components to the PlayerCard component:
-
PlayerData
-
PlayerAttributes
before we start implementing those components, we add some additional data to our players:
players: [ { id: 1, name: "Mo Salah", club: "Liverpool FC", country: "Egypt", position: "Striker", price: 2000, image: "./avatar.png", forSale: false, birthday: "10/10/2000", growth: "180cm", betterLeg: "right", speed: 94, shooting: 90, passes: 89, dribble: 99, defense: 30, physical: 85, }, { id: 2, name: "Robert Lewandowski", club: "FC Bayern", country: "Poland", position: "Striker", price: 3000, image: "./avatar.png", forSale: false, birthday: "20/05/2000", growth: "190cm", betterLeg: "right", speed: 90, shooting: 99, passes: 89, dribble: 85, defense: 78, physical: 89, },];The PlayerData component
<template>  <div class="player-data">    <ul>      <li>        <strong>Birthday: </strong>        <span>{{ player.birthday }}</span>      </li>
      <li>        <strong>Growth: </strong>        <span>{{ player.growth }}</span>      </li>
      <li>        <strong>Better leg: </strong>        <span>{{ player.betterLeg }}</span>      </li>    </ul>  </div></template><script>  export default {    name: "PlayerData",    props: ["player"],  };</script>
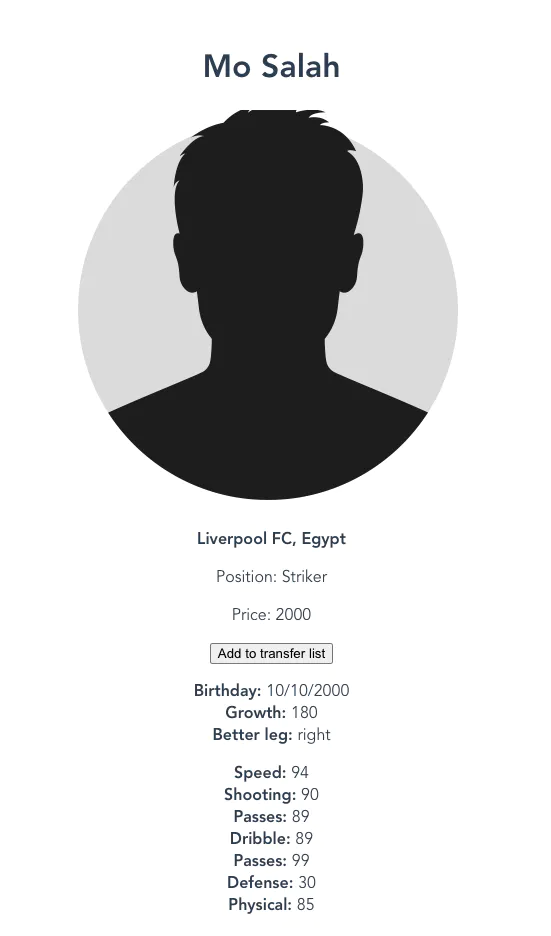
This component renders some information about a player like a birthday, growth, and better leg.
Let’s import it and register in the playerCard Vue component:
<script>import PlayerData from './PlayerCard/PlayerData.vue'
export default {    name: 'PlayerdCard',    props: ['player'],    emits: ['toggle-for-sale'],    components: {        PlayerData    }}</script>
Now we can use it in the template section:
<template>    <div class="player">        (...)
        <div class="additional-data">            <PlayerData :player="player"/>        </div>    </div></template>
The PlayerAttributes component
This component will be pretty the same. The difference is that it renders other data:
<template>  <div class="player-attributes">    <ul>      <li>        <strong>Speed: </strong>        <span>{{ player.speed }}</span>      </li>
      <li>        <strong>Shooting: </strong>        <span>{{ player.shooting }}</span>      </li>
      <li>        <strong>Passes: </strong>        <span>{{ player.passes }}</span>      </li>
      <li>        <strong>Dribble: </strong>        <span>{{ player.passes }}</span>      </li>
      <li>        <strong>Passes: </strong>        <span>{{ player.dribble }}</span>      </li>
      <li>        <strong>Defense: </strong>        <span>{{ player.defense }}</span>      </li>
      <li>        <strong>Physical: </strong>        <span>{{ player.physical }}</span>      </li>    </ul>  </div></template><script>  export default {    name: "PlayerData",    props: ["player"],  };</script>
Note: for now, those components looks the same, but in the future, I am going to add more logic there, so don’t worry, I have an idea 😆
The last thing in this step is registering, importing, and using the new component in PlayerCard.
The final code of the PlayerCard component:
<template>  <div class="player">    <h1>{{ player.name }}</h1>    <img :src="player.image" :alt="player.name" />    <p><strong>{{ player.club }}, {{ player.country }}</strong></p>    <p>Position: {{ player.position }}</p>    <p>      Price: {{ player.price }}      <strong v-if="player.playerLabel">{{ player.playerLabel }}</strong>    </p>    <button type="button" @click="$emit('toggle-for-sale', player.id)">      <span v-if="player.forSale">Remove from transfer list</span>      <span v-if="!player.forSale">Add to transfer list</span>    </button>
    <div class="additional-data">      <PlayerData :player="player" />      <PlayerAttributes :player="player" />    </div>  </div></template><script>  import PlayerData from "./PlayerCard/PlayerData.vue";  import PlayerAttributes from "./PlayerCard/PlayerAttributes.vue";
  export default {    name: "PlayerdCard",    props: ["player"],    emits: ["toggle-for-sale"],    components: {      PlayerData,      PlayerAttributes,    },  };</script>
This is rendered playerCard in the browser:

I wanted to show you a props drilling problem if you forgot, and here you go. We have the PlayerdCard component that receives the player as a prop, and that component has children: PlayerData and PlayerAttributes components that also receive the player as a prop.
Moreover, PlayerCard’s child components also can have children that need a player. A prop drilling problem is about passing props from parent to child. It can be problematic and frustrating if you have a big tree of components.
In React application, there is a way to handle that differently – by using Context. In vue, there is something familiar.
provide/inject as a solution
Instead of passing props to every child component, you can provide data in the parent component and inject this data into children. Take a look:
export default { name: "App", components: { PlayerCard }, data() { return { players: [ { id: 1, name: "Mo Salah", club: "Liverpool FC", country: "Egypt", position: "Striker", price: 2000, image: "./avatar.png", forSale: false, birthday: "10/10/2000", growth: "180", betterLeg: "right", speed: 94, shooting: 90, passes: 89, dribble: 99, defense: 30, physical: 85, }, { id: 2, name: "Robert Lewandowski", club: "FC Bayern", country: "Poland", position: "Striker", price: 3000, image: "./avatar.png", forSale: false, birthday: "20/05/2000", growth: "190", betterLeg: "right", speed: 90, shooting: 99, passes: 89, dribble: 85, defense: 78, physical: 89, }, ], }; }, provide: { players: this.players, },};Then in any child, you can inject players:
export default { name: "PlayerData", inject: ["player"],};Once I injected player into the PlayerData and PlayerAttributes component, I can remove the player prop from them in the PlayerCard component:
<div class="additional-data"> <PlayerData /> <PlayerAttributes /></div>The App still works, but data is passed differently.
Dynamic components
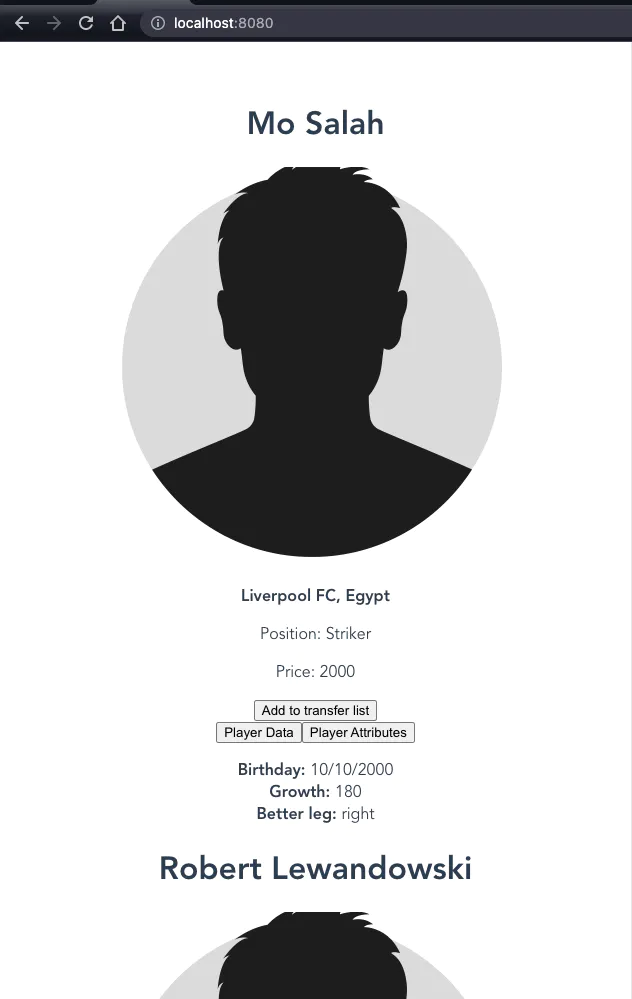
Last thing that I want to show you are dynamic components. Now we have two components in the PlayerCard component: PlayerData and PlayerAttributes, and they are rendered on the screen. I would like to have something like tabs and the possibility to change the active tab. Then only one component corresponding to chosen tab will be visible.
First, create a nav for tabs:
<nav> <button type="button" @click="selectTab('PlayerData')">Player Data</button> <button type="button" @click="selectTab('PlayerAttributes')"> Player Attributes </button></nav>I bound the selectTab method to click event so let’s create this method:
methods: { selectTab(tab) { this.selectedTab = tab; }},Besides, add a new data property with the selectedTab field:
data() { return { selectedTab: 'PlayerData' }},Lastly, let’s render our components dynamically by adding a
<div class="additional-data"> <component :is="selectedTab" /></div>Thanks to that, we can render dynamic components based on data property like this example. When a property is changed, Vue dynamically switch component and render them.
Complete code including dynamic components:
<template>  <div class="player">    <h1>{{ player.name }}</h1>    <img :src="player.image" :alt="player.name" />    <p><strong>{{ player.club }}, {{ player.country }}</strong></p>    <p>Position: {{ player.position }}</p>    <p>      Price: {{ player.price }}      <strong v-if="player.playerLabel">{{ player.playerLabel }}</strong>    </p>    <button type="button" @click="$emit('toggle-for-sale', player.id)">      <span v-if="player.forSale">Remove from transfer list</span>      <span v-if="!player.forSale">Add to transfer list</span>    </button>
    <nav>      <button type="button" @click="selectTab('PlayerData')">        Player Data      </button>      <button type="button" @click="selectTab('PlayerAttributes')">        Player Attributes      </button>    </nav>
    <div class="additional-data">      <component :is="selectedTab" />    </div>  </div></template><script>  import PlayerData from "./PlayerCard/PlayerData.vue";  import PlayerAttributes from "./PlayerCard/PlayerAttributes.vue";
  export default {    name: "PlayerdCard",    props: ["player"],    emits: ["toggle-for-sale"],    provide() {      return {        player: this.player,      };    },    components: {      PlayerData,      PlayerAttributes,    },    data() {      return {        selectedTab: "PlayerData",      };    },    methods: {      selectTab(tab) {        this.selectedTab = tab;      },    },  };</script>
The App looks like this for now:

It isn’t lovely:😎 but, don’t worry – next time, I will show you how to style Vue applications.
Summary
This Vue is a Javascript framework for building web apps. As with other frameworks, it allows using reusable components. Thanks to that, frontend development and building single-page applications are easy and efficient.
Today I showed you basics about components:
-
how to create and register vue component
-
how components communicate with other components
-
how to use props
-
what is a prop drilling problem
-
how to use provide/inject mechanism
-
how to use dynamic components
-
and so on
